Size for bill book:-
- Must at 4mm from order size*
- Example:
– Order size : 210mm x 297mm
– Bleeding size : 214mm x 301mm
IMPORTANT
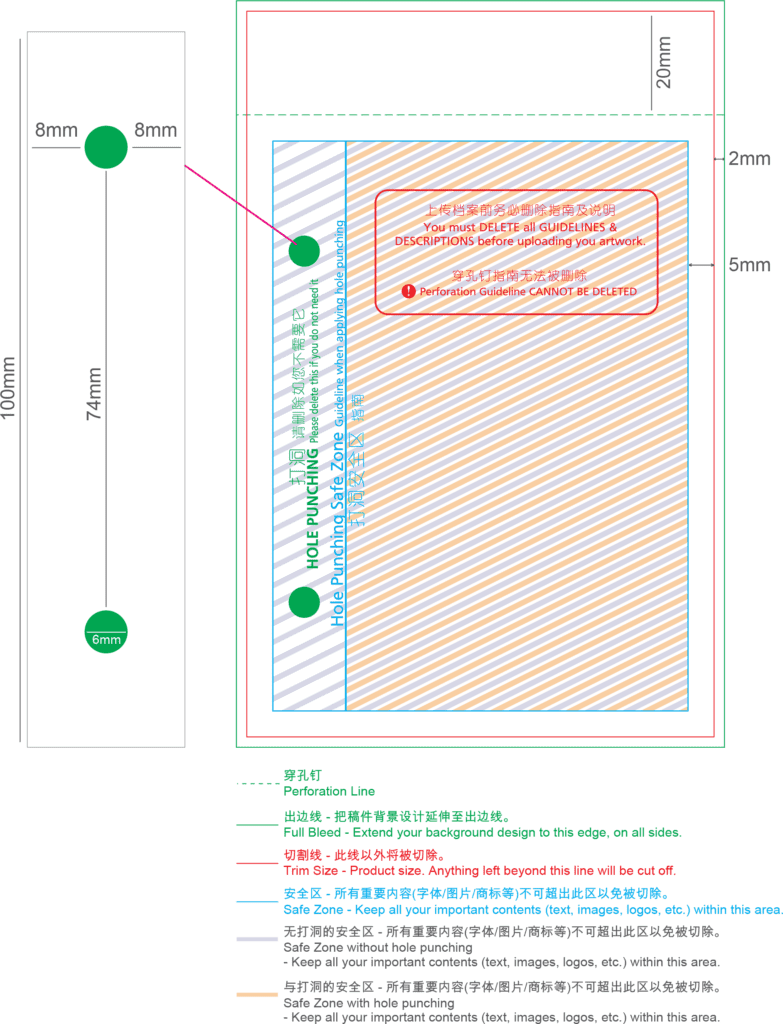
- Expand your background design to the edge of Full Bleed.
- Your vital elements of artwork shall be within the Safe Zone (7mm away from) all side of Full Bleed edge.
- Delete any unneeded elements provided in the template (e.g. Delete the numbering if it not required).
- Hole punching can ONLY be applied on the LEFT, for documents with a length of 100mm and above.
NUMBERING
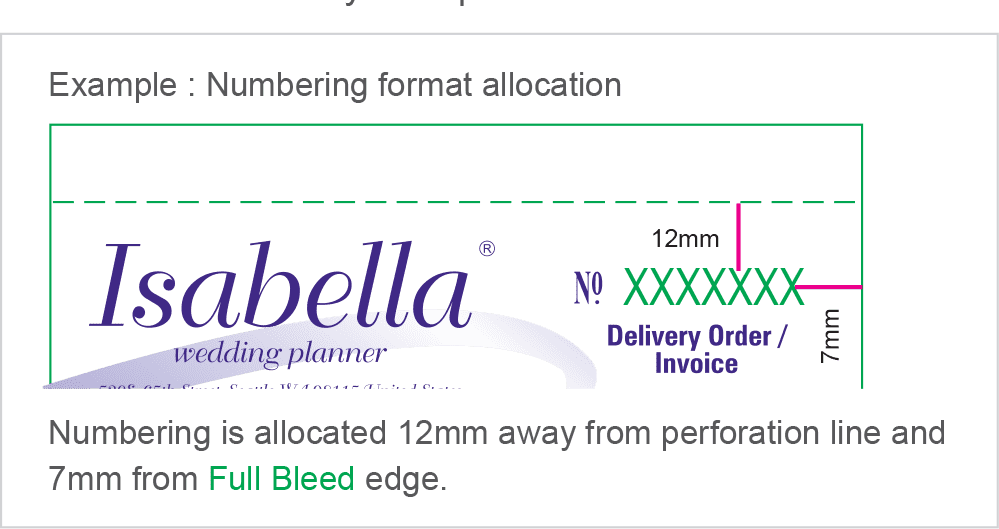
- Mark your numbering area by using the numbering format given in the Product Size Templates.
- Numbering will be printed in RED colour.
- You will only have to key-in the actual numbering during the ordering process. The last digit must always begin with 1.
Examples : 00001 00101 00501 03001 - To indicate numbering in your artwork. Please use the dummy numbering provided in the product size template.
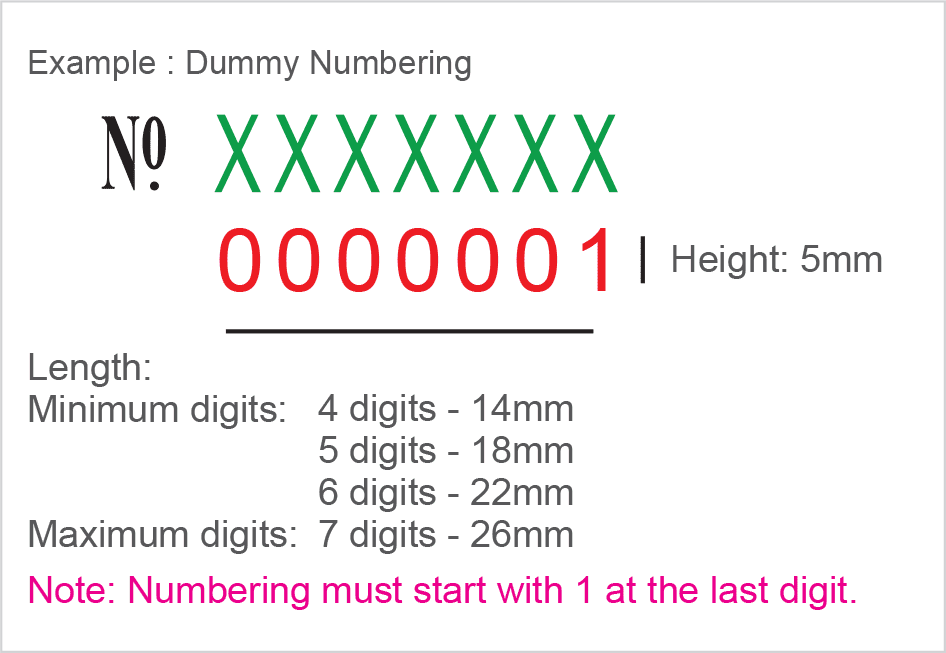
IMPORTANT! Numbering and copy change cannot do in JPEG - If you require less than the default 7 digits (represented by Xs in green), please DELETE the excess Xs accordingly.
Examples : 0001 – XXXX 00101 – XXXXX 000001 – XXXXXX - Ensure your numbering format is: – within Safe Zone – at least 7mm away from Full Bleed edge – at least 12mm away from perforation line
- DELETE entire numbering format if you do not require it.
COPY CHANGE
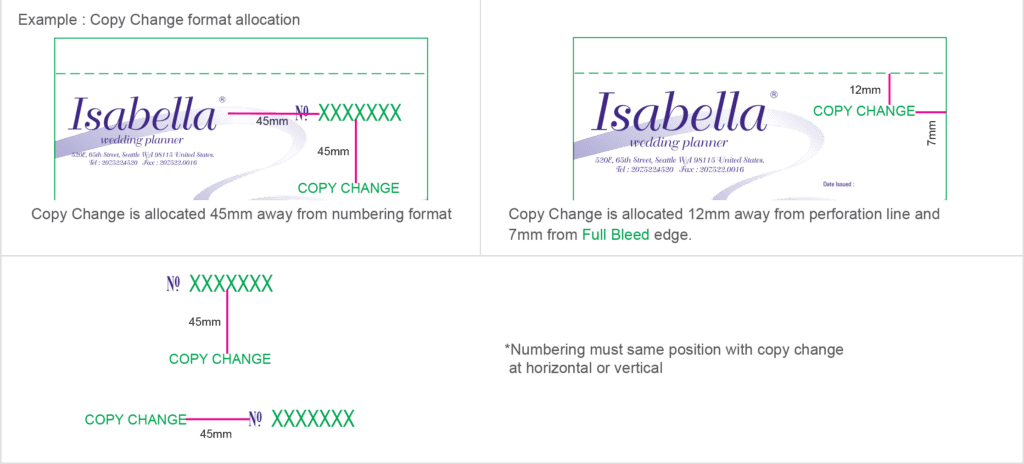
- Mark your copy change area by using the copy change format given in the Product Size Templates.
- You will only have to key-in the actual text accordingly to each layer during the ordering process.
- Make sure your copy change format is: – at least 12mm away from perforation line – at least 7mm away from Full Bleed edge – at least 45mm away from the numbering
- All copy change text will be in:

Note: If English and Chinese fonts are used together, the maximum letter quantity will follow the figures stated for Chinese. - DELETE entire copy change format if you do not require it.
Common Issue for Bill book:
- Wrong color separation
- Wrong orientation – Order landscape, but artwork give potrait – Order potrait, but artwork give landscape
- Wrong finishing – Order book type, but artwork give padding type – Order padding type, but artwork give book type
- Wrong stitching or padding area – Order stitching/padding area at LEFT side, but artwork give at TOP side – Order stitching/padding area at TOP side, but artwork give at LEFT side
- Numbering and copy change position
- Order numbering, but artwork not prepare numbering remark
- Order copy change, but artwork not prepare copy change remark
ARTWORK ORIENTATION
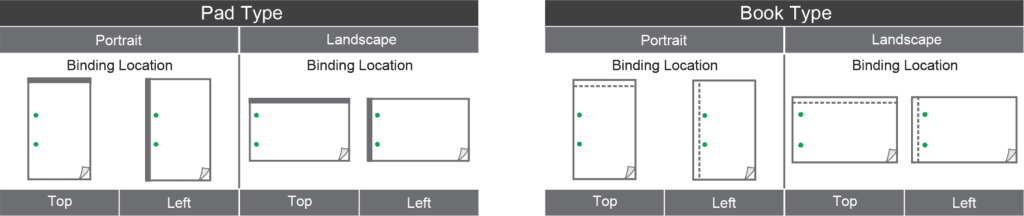
All artworks MUST be positioned upright.
Example
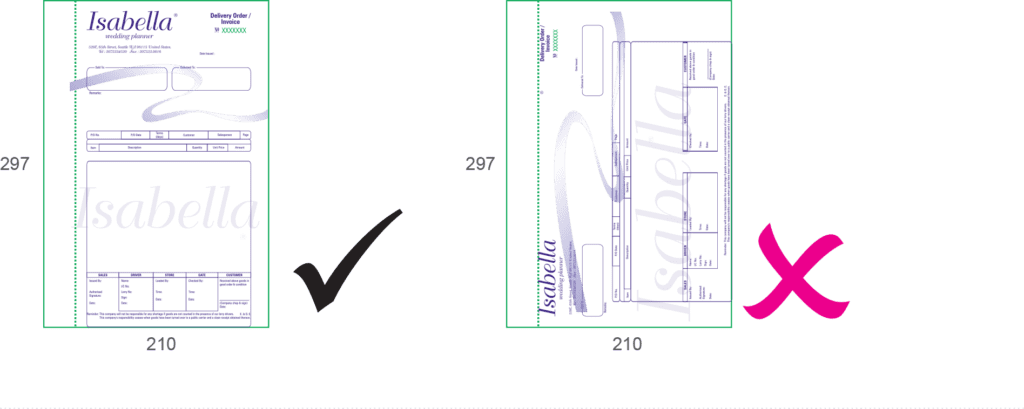
Book Format : Portrait
Size : 210mm x 297mm
Binding Location : Left
Example
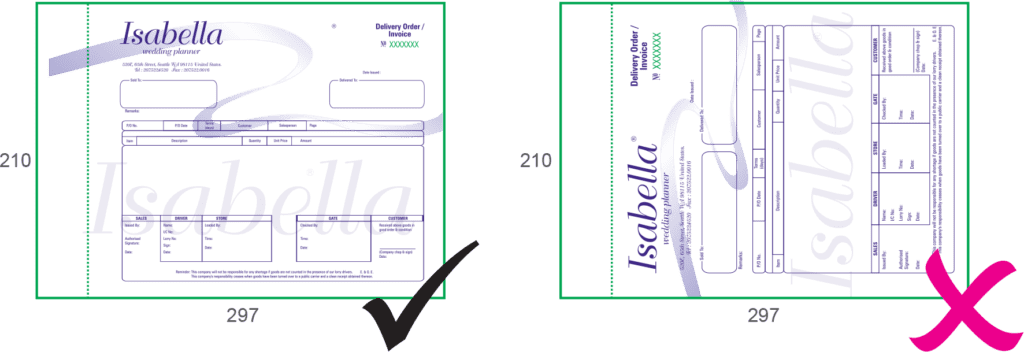
Book Format : Landscape
Size : 210mm x 297mm
Binding Location : Left
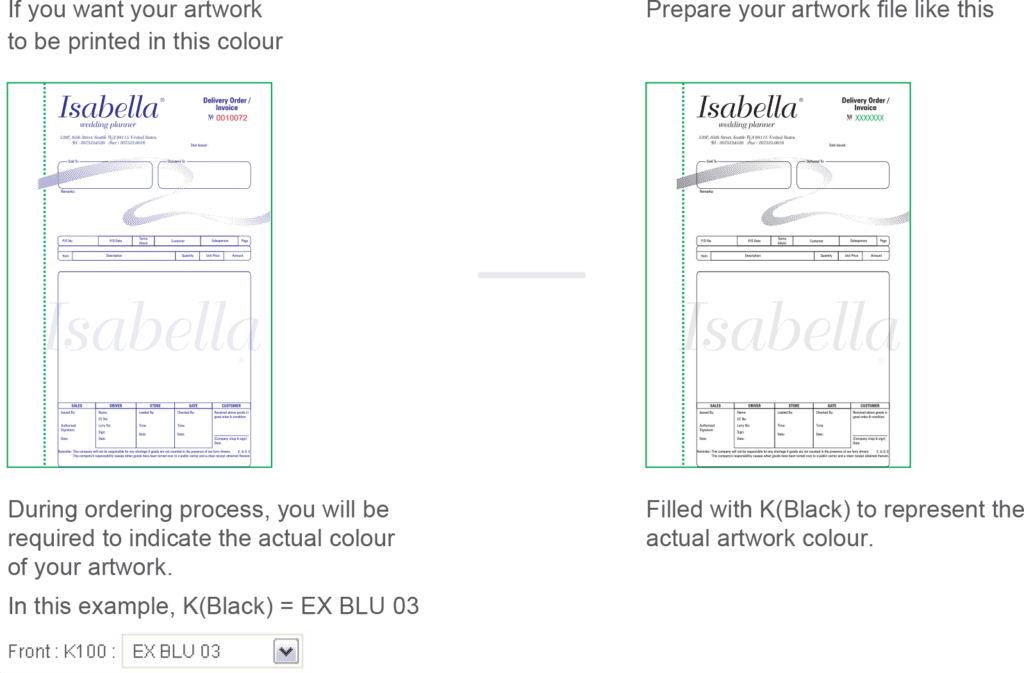
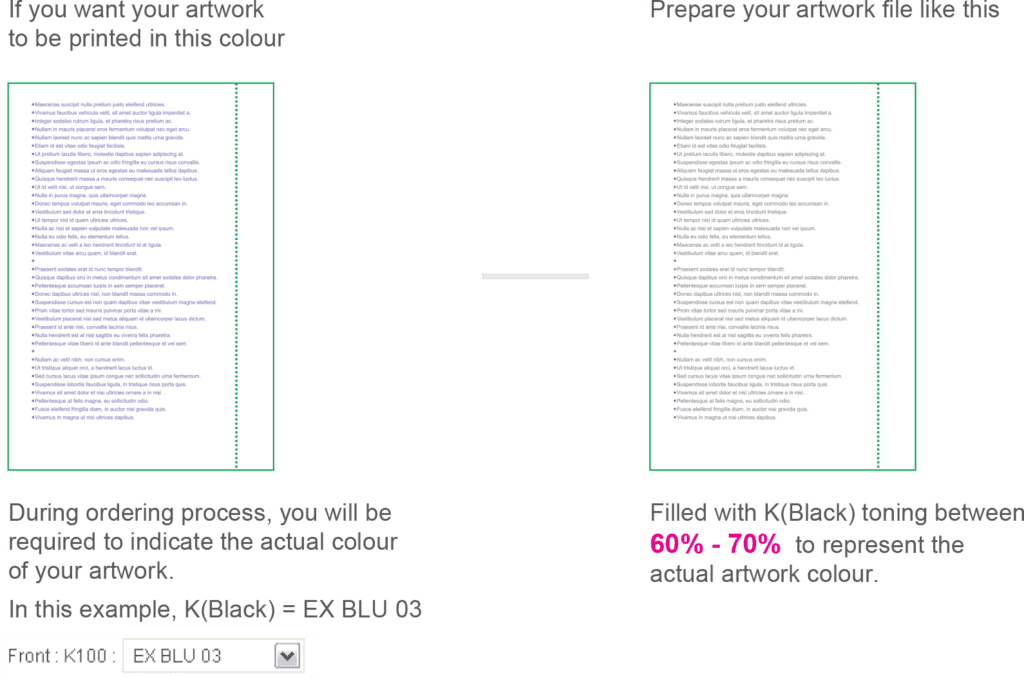
How to prepare your artwork when applying Spot Colour (Front Artwork).
1 SPOT COLOUR
2 SPOT COLOUR
How to prepare your artwork when applying Spot Colour (Back Artwork).
1 SPOT COLOUR
IMPORTANT!
- Only 1 spot colour can be applied for Back Artwork.
- You MUST use spot colour toning between 60% – 70% for back printing.


