SAFE ZONE, BLEEDING, DIE LINE
Example
Let’s say your artwork = 98mm x 92mm
Actual Artwork Size *(Die Line) 98mm x 92mm
Full Bleed Size (must add 4mm from order size) 102mm x 96mm
Safe Zone 2mm from all sides of die-cut edge.
* Die line must be same with order size

IMPORTANT NOTES FOR WASTE REMOVAL FINISHING

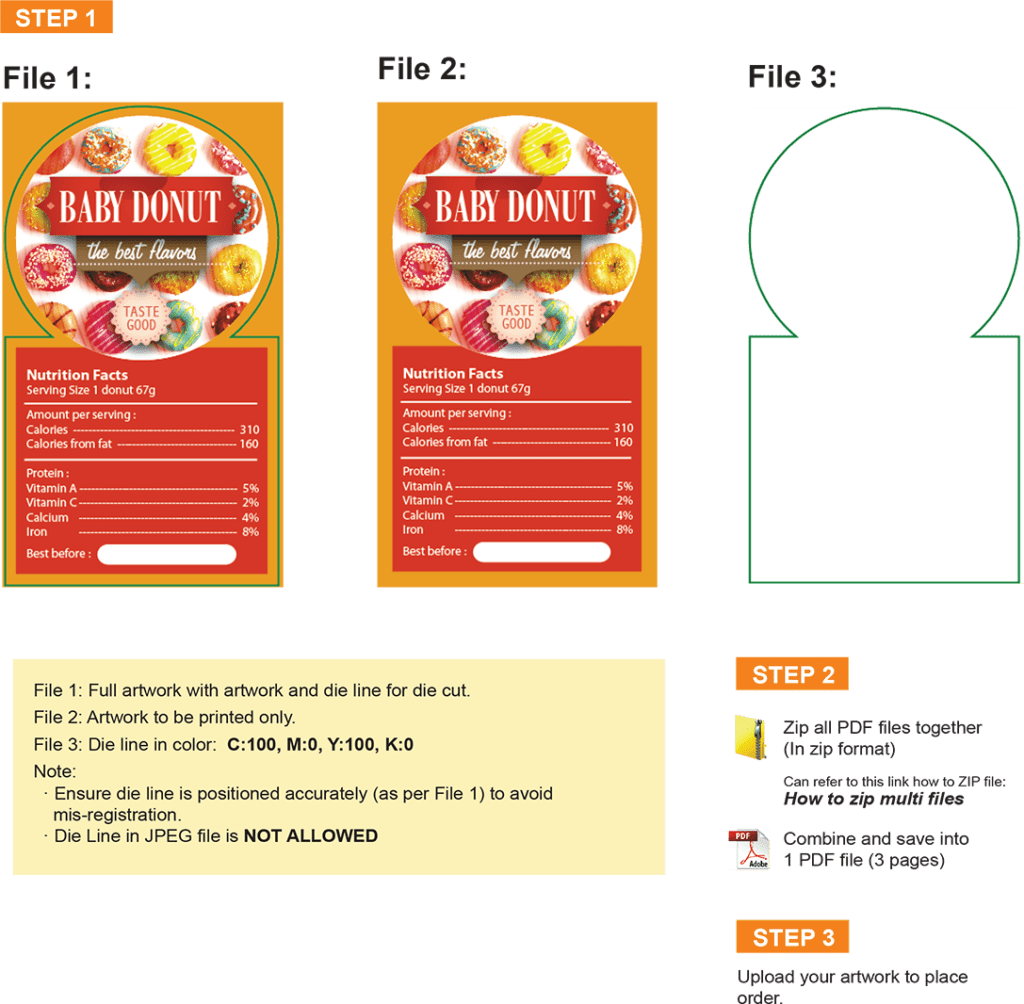
PREPARING FILE FOR LABEL STICKER WITH DIE LINE ARTWORK SPECIFICATION
DIE LINE PRECAUTIONS
Cutting Edge Tolerance: + -1mm
Below are mis-registration scenario that can be happen during the die-cut process when die lines is not correctly placed, as + -1mm cutting edge tolerance has to be taken into consideration.
Scenario 1 :
What happens when die line falls exactly on the artwork line.

Scenario 2 :
What happens when die line is exactly on different colour background. 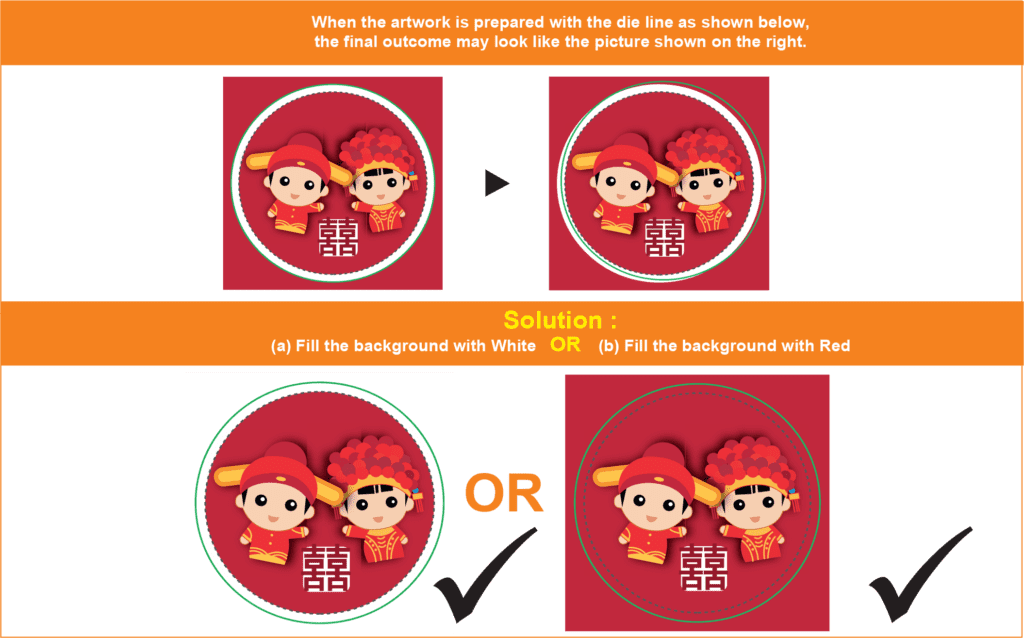
* Customer is advised to revise artwork when these problem are detected.
* Expressprint shall not be held liable for any of defect in printing outcome due to artwork sent not correctly prepared as advised.
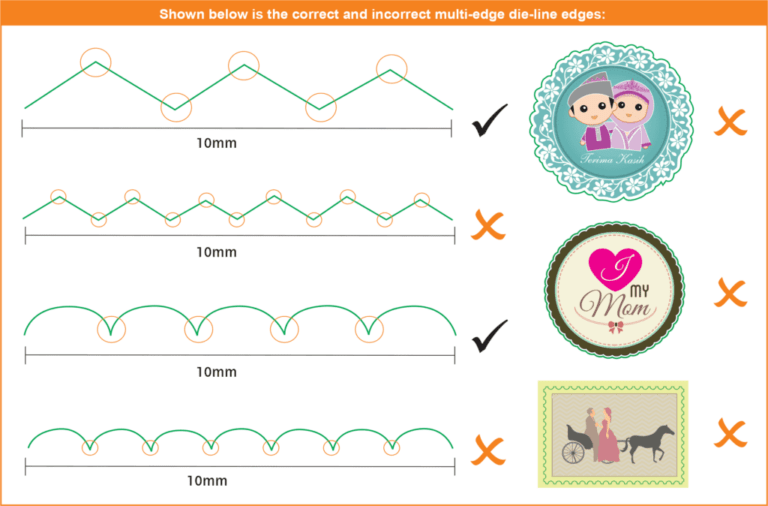
GAP BETWEEN MULTI-EDGES DIE LINE
How to define “Multi-Edges Die Line” – More than 5 cutting edges within 10mm.
WHITE COLOR PRINTING
White color is only available for OPP and not available for other stickers. Printed stickers will show white color due to sticker surface color are white (MKPS, PRPS, PPNG and SYPR). Yet for Transparent OPP sticker , since it is transparent, so printing without white ink will be see through if paste on colored surface. 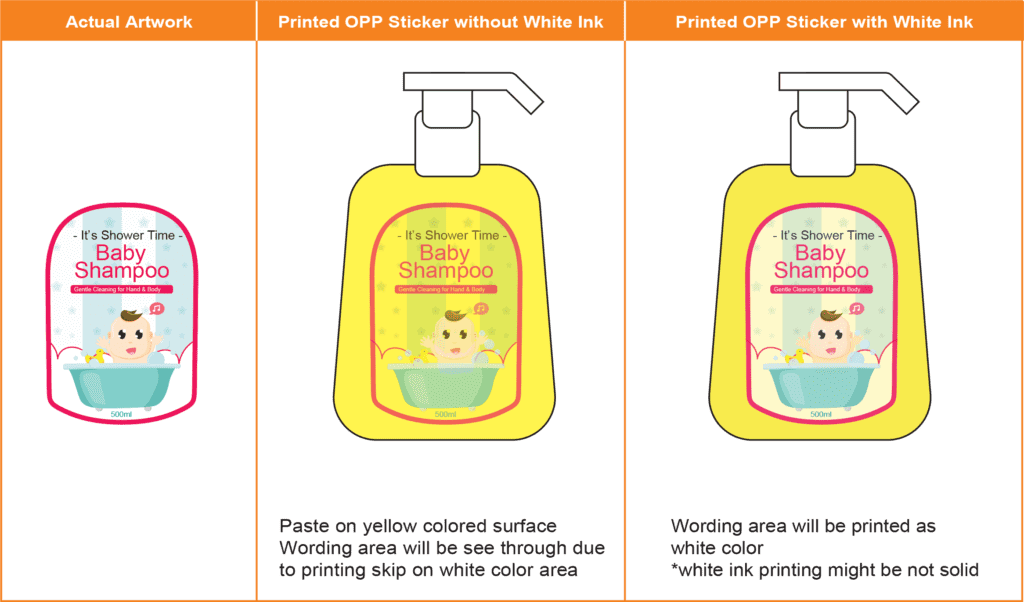
ARTWORK PREPARATION FOR OPP WITH WHITE INK
For order with 4C + White
- Page 1: Overview artwork (Printable artwork and Dieline)
- Page 2: White artwork with Process Black Colour (K100) – rename to “White”
- Page 3: Printable artwork only (CMYK)
- Page 4: Dieline only
For order with White (1C)
- Page 1: Overview artwork (White artwork and Dieline)
- Page 2: White artwork with Process Black Colour (K100) – rename to “White”
- Page 3: Dieline only
Finishing Cut To Size
- Page 1: White artwork with Process Black Colour (K100) – rename to “White” Page 2: Printing artwork
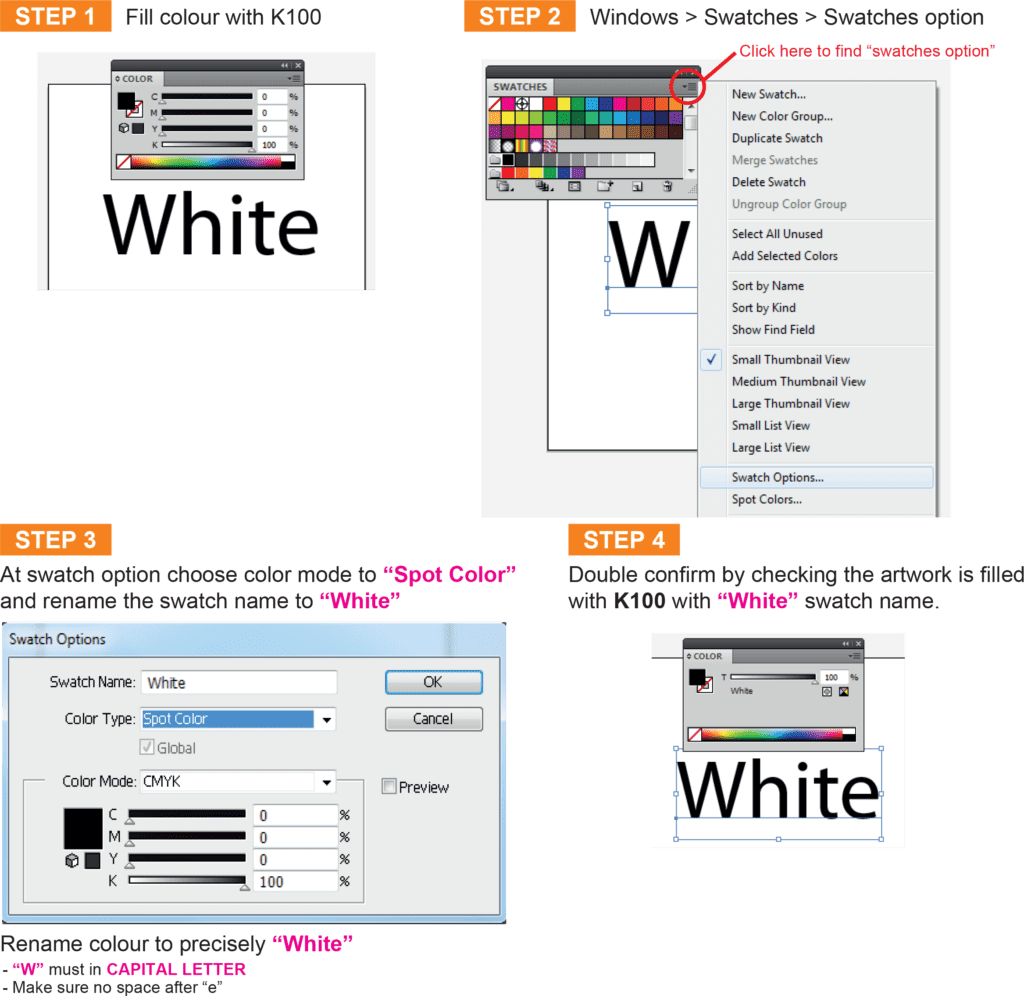
IMPORTANT NOTES IN PREPARING WHITE BASE ARTWORK
- Fill the artwork with black (K100) to indicate the area for white base.
- Rename colour to precisely “ White” to indicate the area of white base instead “WHITE” or “white”
*Expressprint will not held responsibility on any wrong white spot colour naming error (eg. “WHITE” or “white” or “White(space)” - Only use Adobe Illustrator to prepare the white base artwork.
- JPEG file format or JPEG save in PDF format is not allowed while prepare white based artwork.
- White based artwork must prepare in VECTOR Rename the color swatch name by using Adobe Illustrator
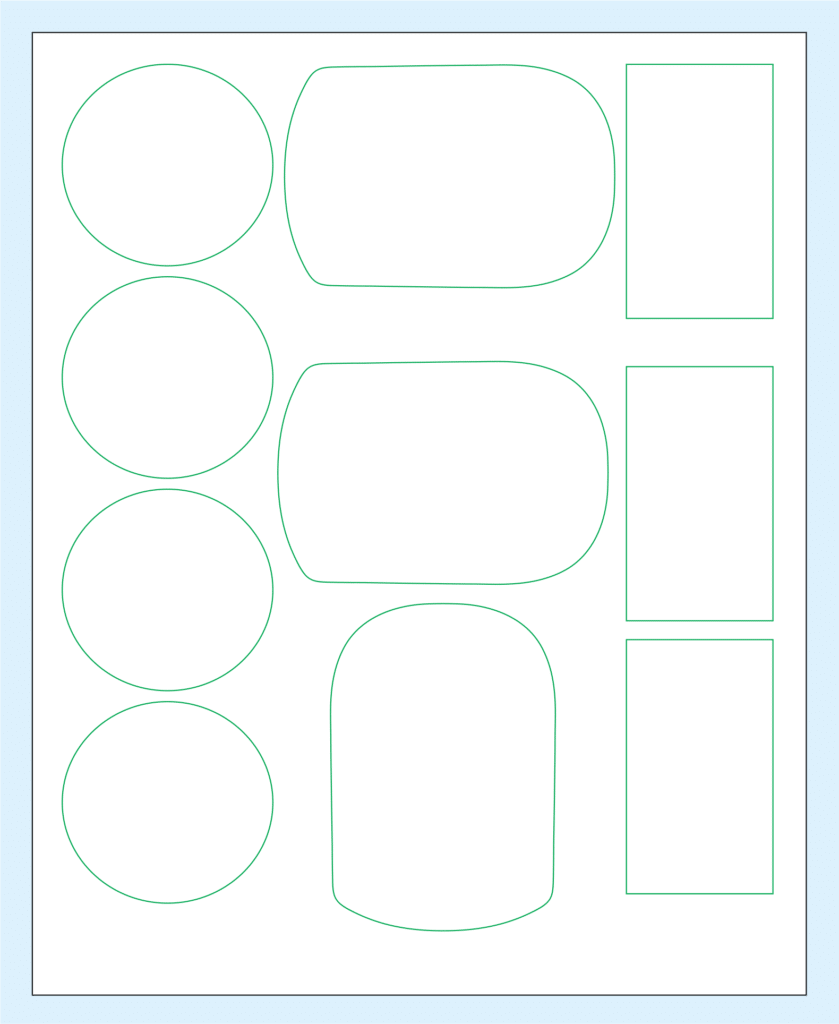
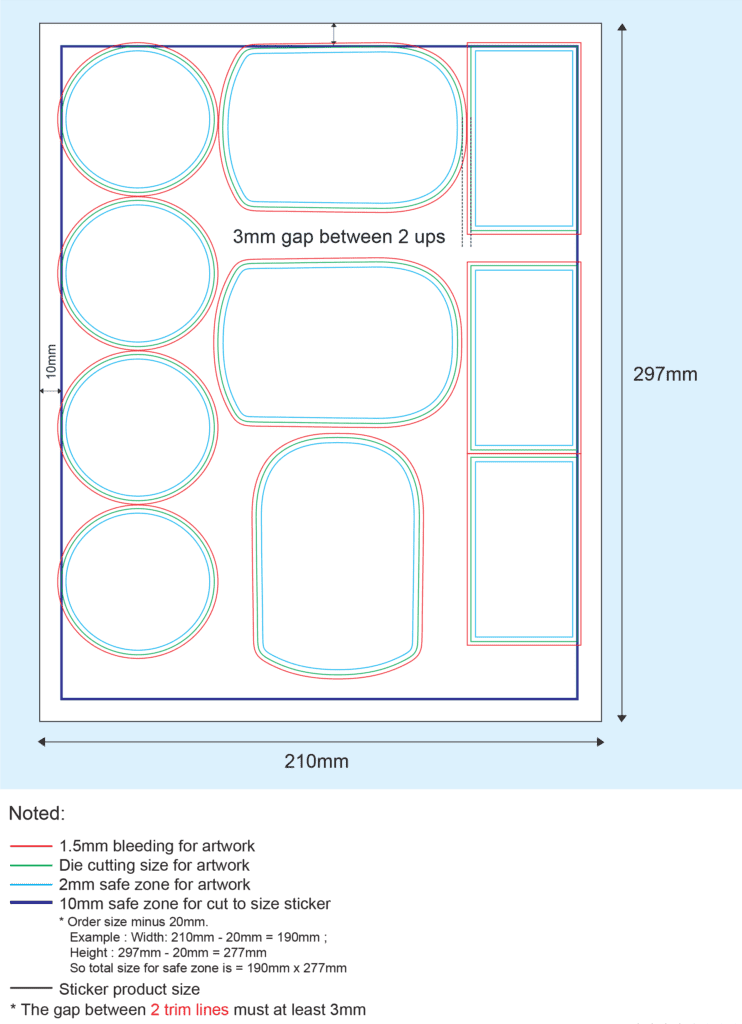
MULTIPLE DIE LINE LABEL STICKER
Artwork Dimension ( Refer to diagram) Please refer to the diagram below for the artwork dimension.
For example, A4 size:
MULTIPLE DIE LINE LABEL STICKER ARTWORK FILE PREPARATION METHOD
Page 1 : CMYK Printing + Die Line

MULTIPLE DIE LINE LABEL STICKER ARTWORK FILE PREPARATION METHOD
Page 2 : CMYK Printing

MULTIPLE DIE LINE LABEL STICKER ARTWORK FILE PREPARATION METHOD
Page 3 : Die Line